This is an important dish. Why? Because it used the first pickings from my garden! This year the first crop picked? Spinach!
So this was a throw together type meal. Let me explain. I've been toying with an idea of putting some of these things together to form a pizza but had not broken down in my head exactly how I was going to do it. Whether I wanted a white sauce or tomato sauce etc. What's a girl to do? Just jump in and try it and make changes later.
This came out VERY Good. The one drawback? Not so great warmed up for lunch the next day. Definately something to serve fresh and hot.
I took pictures, but still having technical difficulties with the camera to computer issue.
Spinach, Asparagus and Goat Cheese Pizza
Ingredients:
1 lb fresh asparagus, remove tough stemmy ends and chop the rest into 1 inch pieces
Handful of fresh spinach leaves
1 vidalia onion (medium)sliced
1/2 stick butter
1/2 pound ground turkey browned in olive oil and drained (optional)
1 Roll out pizza dough
2 ounces of Goat Cheese
1 cup mozzerella
1 cup tomato sauce (or leftover homemade soup like I used)
salt and pepper to taste
Directions:
Roll out pizza dough onto greased cookie sheet or pizza stone. Bake at 425 for 10 minutes. (You don't want it all the way done).
Melt butter on stove, add onions and asparagus. Cover and saute for about 3 minutes. Add spinach leaves. Saute for another 2 minutes until leaves are wilted.
Spread tomato sauce/soup over crust. Sprinkle with cooked ground turkey. Spread aspragus, onions and spinach over pizza. Crumble goat cheese on top. Salt and pepper if needed. Spread mozzerella over entire pizza and then use the butter drippings over the cheese (this forms a golden crust). Bake at 425 for 10 minutes or until crust is browned and cheese is melted and golden).
Serve hot and fresh!
Showing posts with label garden. Show all posts
Showing posts with label garden. Show all posts
Monday, May 3, 2010

Tuesday, April 27, 2010
Tomato Soup
It's that time of year, where us Southern gardeners start dreaming of that first fresh ripe tomato. We envision tomato sandwiches, tomato pies, thick slices of tomato topping creamed corn and biscuits. mmmmm. Before we get to the summer though we have to make a mad effort to finish out our stores of food that we have stingely guarded over the long dark winter. We ration ourselves out to make sure we have an array good quality ingredients to last till spring and somehow, we always have an abundance left and chide ourselves every year.
This year, I have ONE jar of canned tomatoes left. I've actually had to substitute using cans from the store, but I found one quart I had missed hiding behind a casserole dish in the pantry. So I decided to give a go at Home made Tomato Soup. I looked at several recipes but decided to wing it with a loose inspiration from Robert St. John's Deep South Staples.
I did not get mine perfectly smooth and tomato-y like Campbell's. So please don't try this if you are expecting a home made version of the classic condensed soup. This a is light tomato creamy flavor. Perfect for dipping a Grilled cheese!
*Don't yell at me. I promise I've been taking pictures, but I've been trying a new trick of typing up the drafts while items are cooking so that I don't get terribly behind in posts AND pictures. I'm still figuring out the time tables of better blogging practises while living!
Tomato Soup
Ingredients:
1 Quart Jar of canned tomatoes with juice
1 can diced tomatoes
4 tbs butter
1 vidalia onion
3 cloves garlic
1 large carrot
1 stick celery
1 tsp salt
1/4 tsp pepper
2 cups chicken broth
1/4 cup flour
1 cup cream
1/2 stick butter
Directions:
Melt 4 tbs butter in sauce pan. Add finely chopped onion and garlic. Stir. Add finely chopped carrot and celery. (I use a mini food chopper and do each item seperately). Cook for about 5 minutes. Add salt and pepper. Add chicken broth. Stir. Add all the tomatoes. Bring to a light boil then reduce to simmer for as long as possible to let the flavors blend. About an hour.
In a seperate sauce pan, melt the 1/2 stick butter. Add flour and cook until a smooth paste. Add cream and cook until blended. Add to tomato mixture. Pour entire mixture into a blender or food processer and pulse until tomatoes are well chopped and mixture is smooth.
This year, I have ONE jar of canned tomatoes left. I've actually had to substitute using cans from the store, but I found one quart I had missed hiding behind a casserole dish in the pantry. So I decided to give a go at Home made Tomato Soup. I looked at several recipes but decided to wing it with a loose inspiration from Robert St. John's Deep South Staples.
I did not get mine perfectly smooth and tomato-y like Campbell's. So please don't try this if you are expecting a home made version of the classic condensed soup. This a is light tomato creamy flavor. Perfect for dipping a Grilled cheese!
*Don't yell at me. I promise I've been taking pictures, but I've been trying a new trick of typing up the drafts while items are cooking so that I don't get terribly behind in posts AND pictures. I'm still figuring out the time tables of better blogging practises while living!
Tomato Soup
Ingredients:
1 Quart Jar of canned tomatoes with juice
1 can diced tomatoes
4 tbs butter
1 vidalia onion
3 cloves garlic
1 large carrot
1 stick celery
1 tsp salt
1/4 tsp pepper
2 cups chicken broth
1/4 cup flour
1 cup cream
1/2 stick butter
Directions:
Melt 4 tbs butter in sauce pan. Add finely chopped onion and garlic. Stir. Add finely chopped carrot and celery. (I use a mini food chopper and do each item seperately). Cook for about 5 minutes. Add salt and pepper. Add chicken broth. Stir. Add all the tomatoes. Bring to a light boil then reduce to simmer for as long as possible to let the flavors blend. About an hour.
In a seperate sauce pan, melt the 1/2 stick butter. Add flour and cook until a smooth paste. Add cream and cook until blended. Add to tomato mixture. Pour entire mixture into a blender or food processer and pulse until tomatoes are well chopped and mixture is smooth.
Saturday, April 17, 2010
The Big Garden
Since I briefly introduced the newest gardening adventure this week, its time to show the tranformation. (and frankly, this has been consuming my life lately and my cooking/posting has suffered but we are almost done with the worst time consuming part --I'm deluding myself right now, work with me.)
As you read in the previous post this piece of our property was part of our horse pasture and has recieved quite a lot of manure over the past several years along with a lot of trampling so we have fertile hard packed dirt (and a lot of crab grass).
Since I do not have my beautiful horses to stare at anymore, I wanted to try and go larger scale on my gardening efforts so I could can more and feed more people (elderly neighbors etc.). So with the help of my parents and the loan of my neighbor's (Uncle Bill) tractor we begin the process of turning this fallow filed into a thriving garden again (the way I remember it from my childhood).
Here are the beginning stages to what we call "The BIG Garden": plowing the field to break it up-letting it freeze to kill grass roots. Will bring you more pictures soon (as they are still on the camera and we are finishing the planting today!).
My Dad (isn't he the cutest thing?)

Cutting the field:

Freezing the cut field: (thank you weather for cooperating!)
As you read in the previous post this piece of our property was part of our horse pasture and has recieved quite a lot of manure over the past several years along with a lot of trampling so we have fertile hard packed dirt (and a lot of crab grass).
Since I do not have my beautiful horses to stare at anymore, I wanted to try and go larger scale on my gardening efforts so I could can more and feed more people (elderly neighbors etc.). So with the help of my parents and the loan of my neighbor's (Uncle Bill) tractor we begin the process of turning this fallow filed into a thriving garden again (the way I remember it from my childhood).
Here are the beginning stages to what we call "The BIG Garden": plowing the field to break it up-letting it freeze to kill grass roots. Will bring you more pictures soon (as they are still on the camera and we are finishing the planting today!).
My Dad (isn't he the cutest thing?)

Cutting the field:

Freezing the cut field: (thank you weather for cooperating!)

Thursday, April 15, 2010
Food and Faith Challenge: Week 2
I'm going to go about the Call to Action a little bit different this week.
I'm going to start with a picture. This is part of my land:

I walk through my land on a daily basis to watch things grow. Everyday I walk through my gardens to monitor my plants, pinch a leaf, water here, pull a weed there. This land is important to me. It's been in my family for decades and multiple generations. It has been split, inherited, sold, parceled etc to a form unrecognizable to the original piece but I still have part of it. Most of my neighbors are still family. And this land still grows food for us and noursishes my soul.
The portion you are seeing used to be a fantastic garden when I was a child, feeding several families. Then it was converted to horse pasture for a decade, which is how I used it when we first moved in. We sold our horses last fall for several reasons and this year, we are turning it back into a large garden. I've watched it go from a garden, to green pasture, to snow covered, to barren land and now to rows of seeds and plantings that will soon be food. It's an amazing process and quite frankly more than I can deal with but I'm doing it anyway.
I'm connected to this land in so many ways and I will continue to watch it change and grow and do my best to work with it as much as possible. I don't have a tractor so I had to borrow this one that you see from family to return it to a garden as 3/4 acre is a bit much to do by hand but all the tending? It will be by hand. And I will raise my children here and teach them to watch things grow.
Walk out on a piece of property, even if its a townhome patio and find the simple beauty in nature.
And this? This is good NC red clay with horse manure.
•Walk slowly and mindfully through a piece of land that’s important to you.
I'm going to start with a picture. This is part of my land:

I walk through my land on a daily basis to watch things grow. Everyday I walk through my gardens to monitor my plants, pinch a leaf, water here, pull a weed there. This land is important to me. It's been in my family for decades and multiple generations. It has been split, inherited, sold, parceled etc to a form unrecognizable to the original piece but I still have part of it. Most of my neighbors are still family. And this land still grows food for us and noursishes my soul.
The portion you are seeing used to be a fantastic garden when I was a child, feeding several families. Then it was converted to horse pasture for a decade, which is how I used it when we first moved in. We sold our horses last fall for several reasons and this year, we are turning it back into a large garden. I've watched it go from a garden, to green pasture, to snow covered, to barren land and now to rows of seeds and plantings that will soon be food. It's an amazing process and quite frankly more than I can deal with but I'm doing it anyway.
I'm connected to this land in so many ways and I will continue to watch it change and grow and do my best to work with it as much as possible. I don't have a tractor so I had to borrow this one that you see from family to return it to a garden as 3/4 acre is a bit much to do by hand but all the tending? It will be by hand. And I will raise my children here and teach them to watch things grow.
Walk out on a piece of property, even if its a townhome patio and find the simple beauty in nature.
And this? This is good NC red clay with horse manure.

Tuesday, March 30, 2010
Tornado Update
For those of you who heard about the recent tornado touch downs in High Point, NC (it made national news), I would like to give a personal update. The path of the tornado was about 1/2 mile from my house. If you had stood on my front porch you could have watched it the whole time. How scary is that?
A lovely Category (F) 3 that left a path of destruction over 200 yards wide for a couple miles. Trees, homes, powerlines, day car, vehicles etc. destroyed. So far I have not heard of anyone missing or dead and that is a wonderful thing. Homes that i drive by are leveled or split in half. It's very sad and when I drive by and see the utter devastation, it makes my heart drop to my feet to realize how close it came.
I am blessed with caring friends and family and as I sat huddled in my closet with my three dogs and cat curled around me (because like their mother they are big fat wusses too), my friend Beth and sister T were texting me where the storms were and how bad.
We lost our power at approx. 7pm Sunday evening when the first cell came through. Last night as I was trying to get the decrepid old generator going to try and save my freezer foods and scoop water out of my pool to flush my toilets (I'm on a well=no power, no water), our power came back on. I actually did a dance in my driveway and shouted "I have powerrrrrrrrr" (think He-man cartoon). I'm a dork, I know.
Our roof is missing more shingles, my privacy fence around the pool bit the dust, and my garden flooded. We'll turn the first two in on HO insurance and pray they come through for us as the roof has taken a lot of hits. We'll see how the garden does in the next two weeks. Hopefully my small seedlings will come back out and my seeds won't rot.
All in all, I'm very fortunate and I think its always a good reminder to take a moment and count your blessings and not just when Mr. Tornado passes you by. So today, take a moment to appreciate the good things in your life and tell those around you how much they mean to you.
A lovely Category (F) 3 that left a path of destruction over 200 yards wide for a couple miles. Trees, homes, powerlines, day car, vehicles etc. destroyed. So far I have not heard of anyone missing or dead and that is a wonderful thing. Homes that i drive by are leveled or split in half. It's very sad and when I drive by and see the utter devastation, it makes my heart drop to my feet to realize how close it came.
I am blessed with caring friends and family and as I sat huddled in my closet with my three dogs and cat curled around me (because like their mother they are big fat wusses too), my friend Beth and sister T were texting me where the storms were and how bad.
We lost our power at approx. 7pm Sunday evening when the first cell came through. Last night as I was trying to get the decrepid old generator going to try and save my freezer foods and scoop water out of my pool to flush my toilets (I'm on a well=no power, no water), our power came back on. I actually did a dance in my driveway and shouted "I have powerrrrrrrrr" (think He-man cartoon). I'm a dork, I know.
Our roof is missing more shingles, my privacy fence around the pool bit the dust, and my garden flooded. We'll turn the first two in on HO insurance and pray they come through for us as the roof has taken a lot of hits. We'll see how the garden does in the next two weeks. Hopefully my small seedlings will come back out and my seeds won't rot.
All in all, I'm very fortunate and I think its always a good reminder to take a moment and count your blessings and not just when Mr. Tornado passes you by. So today, take a moment to appreciate the good things in your life and tell those around you how much they mean to you.
Friday, January 8, 2010
Zucchini Almond Biscotti
I wanted a nice Southern Biscotti while the inlaws were in so I tried my hand at creating a soothing blend between a scrumptious zucchini bread and a flavorful almond biscotti. It turned out pretty well. Biscotti simply means twice baked so I started with a basic Zucchini bread recipe that is tried and true, but flavored it up with some slivered almonds and almond extract. Then cut it in slices and placed on parchment and rebaked on a low temp to remove the moisture. I think it got a little too done but it paired excellently with coffee. Enjoy! I think this would be perfect in the summer too with fresh zuchini to enjoy on a Saturday morning overlooking the garden with a cup of coffee. YUM!
Zucchini Almond Bread

Ingredients:
3 eggs
2 cups sugar
1 cup oil
2 cups shredded zucchini
1 cups flour (self rising)
2tsp cinnamon
1 tsp vanilla
1 tsp almond extract
1 1/2 c. slivered almonds
Directions:
Beat together eggs, sugar, oil, zucchini. Slowly add in dry ingredients. Finish with your extracts and then fold in almonds. Bake in 13 x 9 greased pan for 1 hour at 350.

When it has cooled, turn loaf out and cut into biscotti strips. Place strips on parchment paper in oven at 200. Cook each side for about an hour to slowly remove moisture but do not burn. Keep an eye on them, you may choose to lower the heat or the cooking times if you like them a little less crispy on the inside.
Zucchini Almond Bread

Ingredients:
3 eggs
2 cups sugar
1 cup oil
2 cups shredded zucchini
1 cups flour (self rising)
2tsp cinnamon
1 tsp vanilla
1 tsp almond extract
1 1/2 c. slivered almonds
Directions:
Beat together eggs, sugar, oil, zucchini. Slowly add in dry ingredients. Finish with your extracts and then fold in almonds. Bake in 13 x 9 greased pan for 1 hour at 350.

When it has cooled, turn loaf out and cut into biscotti strips. Place strips on parchment paper in oven at 200. Cook each side for about an hour to slowly remove moisture but do not burn. Keep an eye on them, you may choose to lower the heat or the cooking times if you like them a little less crispy on the inside.
Sunday, December 20, 2009
Let it Snow, Let it Snow
As I sit here updating my blog pictures from this weekend, I am still staring out my office window at a melting world of blinding white, clear blue skies and bright sunshine.
I will be venturing forth shortly to go grocery shopping for my holiday week supplies but I thought I would take a moment and share the magic of snow at my home in NC.
Once part of my horse pasture and future home to my 2010 large garden (taken while it was still snowing).

Tedda guarding the cleared porch path.

It's hard to tell but the side of my house is completely glazed in ice.

I will be venturing forth shortly to go grocery shopping for my holiday week supplies but I thought I would take a moment and share the magic of snow at my home in NC.
Once part of my horse pasture and future home to my 2010 large garden (taken while it was still snowing).

Tedda guarding the cleared porch path.

It's hard to tell but the side of my house is completely glazed in ice.

Sunday, November 29, 2009
Pink is the New Fall color
I woke up to a foggy Thanksgiving morning. The air was crisp and cold, the world was silent and still. It was one of those rare mornings that creeps into your soul like the fingers of fog grasping at your ankles.
And there it was. In my front yard, like a burning bush of hope to the Isrealites. My Fall camilla, blooming like it has never bloomed before. A ray of pink, in a silent foggy sinful world.
A gift, a promise, a beacon of hope.
 silent and still. It was one of those rare mornings that creeps into your soul like the fingers of fog grasping at your ankles.
And there it was. In my front yard, like a burning bush of hope to the Isrealites. My Fall camilla, blooming like it has never bloomed before. A ray of pink, in a silent foggy sinful world.
A gift, a promise, a beacon of hope.

Saturday, July 19, 2008
First Pickings
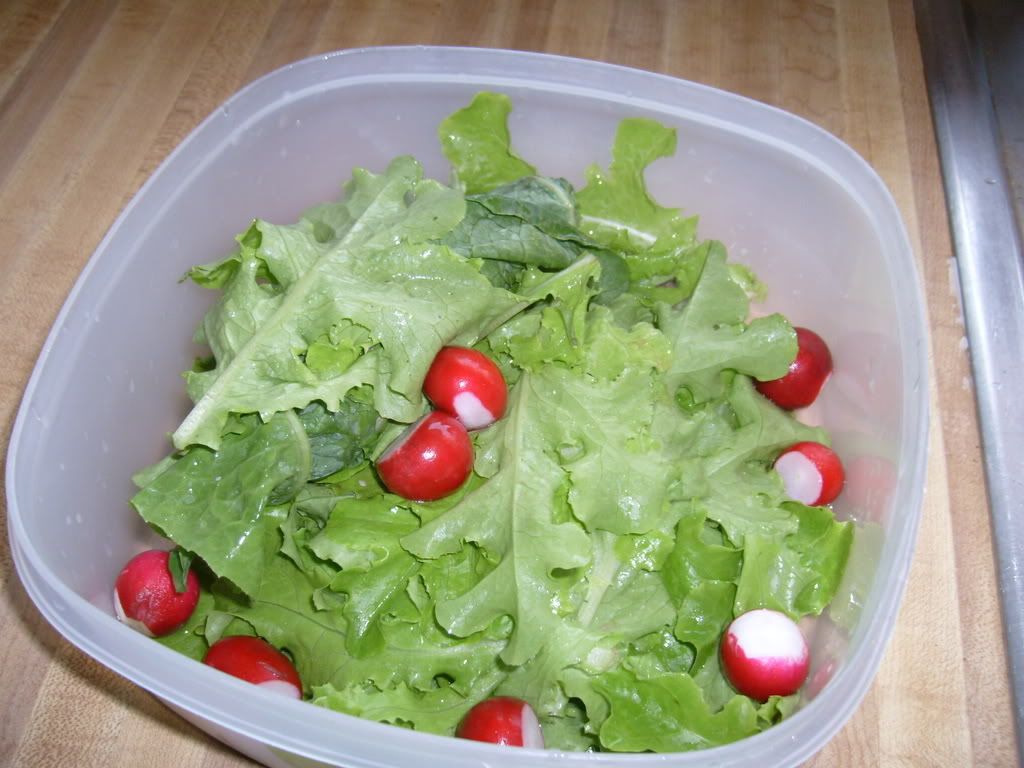
Our first pickings were lettuce and raddishes. I was so excited! I did take pictures...of the first things coming out of the garden...the past month I have been very slack about it...which is sad..because my counters have literally been over run with vegetables and I forget to take their pictures. So please enjoy my garden salad pictures since I'm stingy on sharing the rest of it..LOL


Growing, growing GONE!
It seems like our garden grew overnight....we waited patiently and then BAM...everything started getting huge!! (must have been when the rain finally came in...ya think?)
 cabbage
 squash and zuchini
Lettuce (below)

 Houston, we have sighted a tomato!
Green beans running!
Mary Mary, How does your garden grow?
These pictures were taken mid-late May...the plants had taken root and begun to grow. We had added zuchini, squash, tomatoes, eggplans, corn, cucumbers, peppers and mulched around the plants in part of the beds.
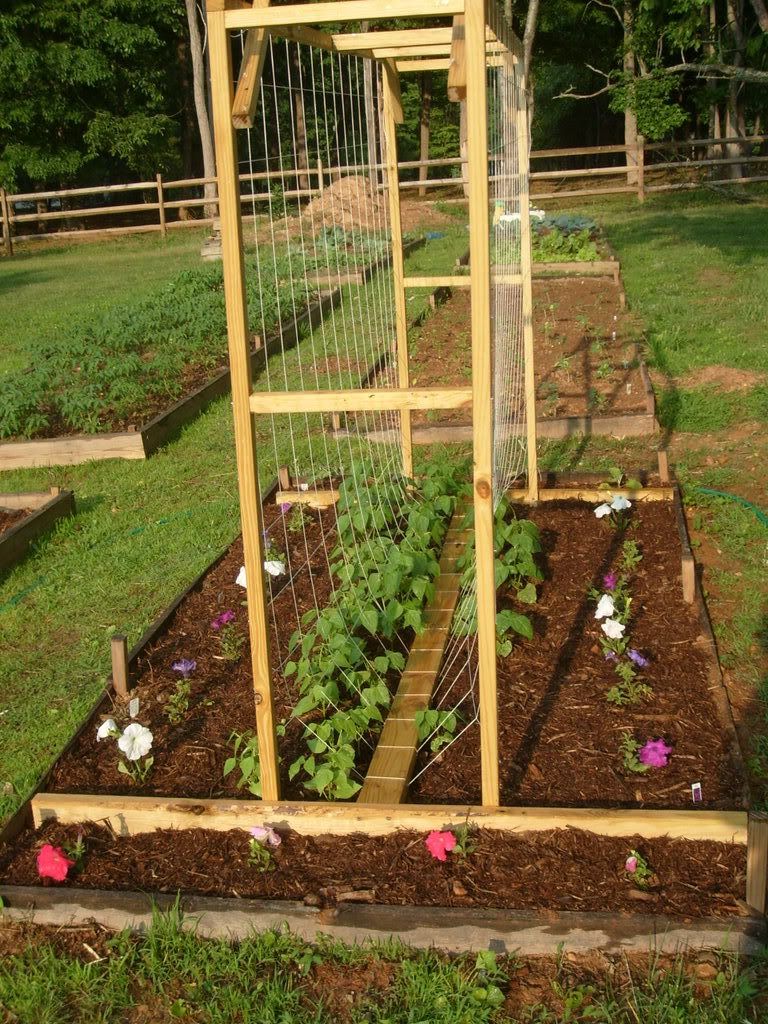
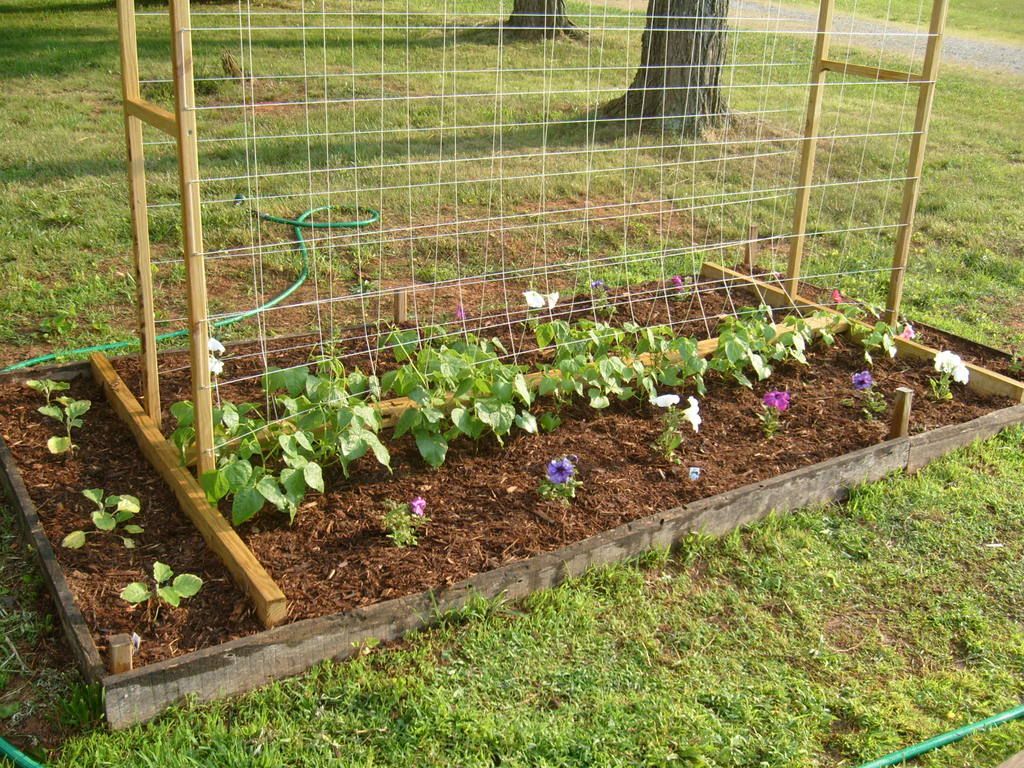 As a side note: I had read somewhere that petunia's give greenbeans a stronger flavor so I always plant them together....a side benefit is it makes that garden pretty!
Garden Beginnings
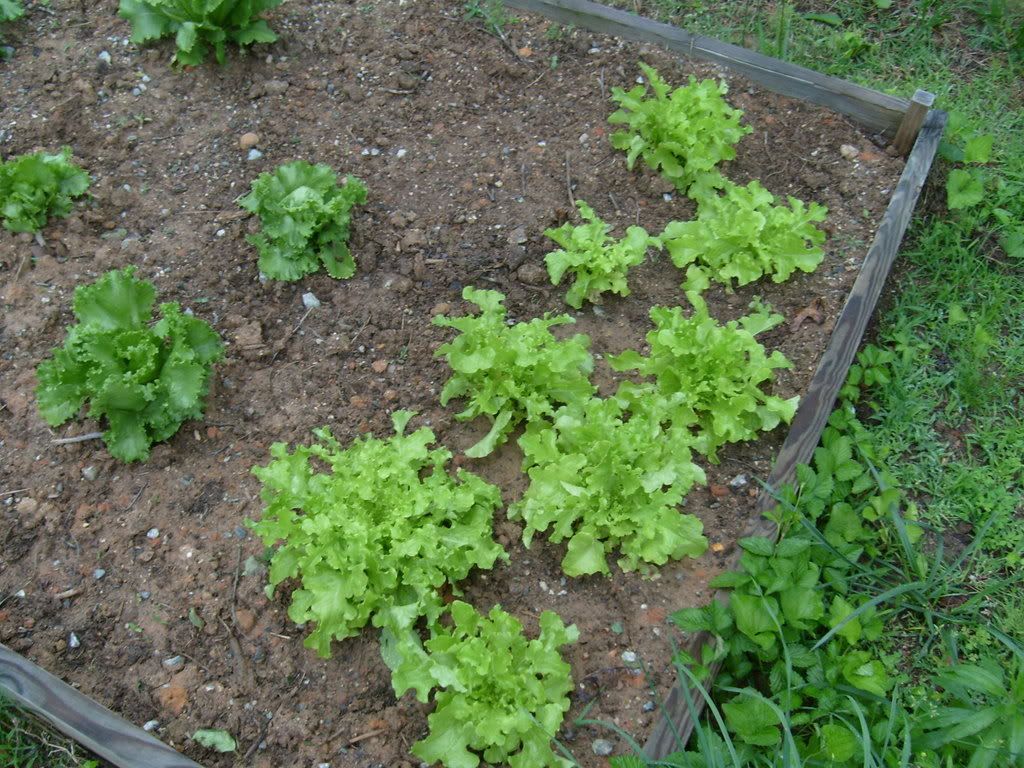
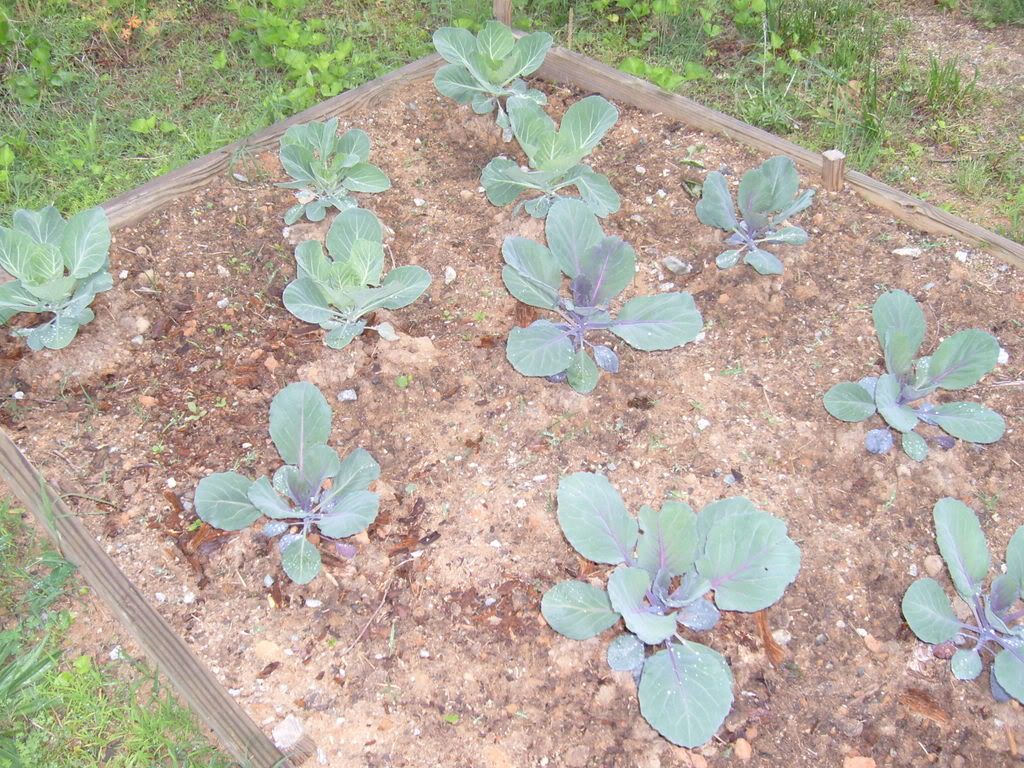
I have taken several pics of my garden through the planting and harvesting process. I am going to try and post them in order. This first post is a few weeks after planting. The first things in the ground were radish, cabbage, lettuce and greenbeans.
Wednesday, April 30, 2008
Garden Trellis
I will have a few new updates this week. YAY!! I did try a new recipe this past weekend but it was absolutely horrible so I'm not posting it here. I have another recipe this coming Friday so stay tuned for more Recipes! I have a quick garden update for now though. We have had rain for Eight weekends straight now so I have had a hard time getting everything accomplished in the garden that I need to do.
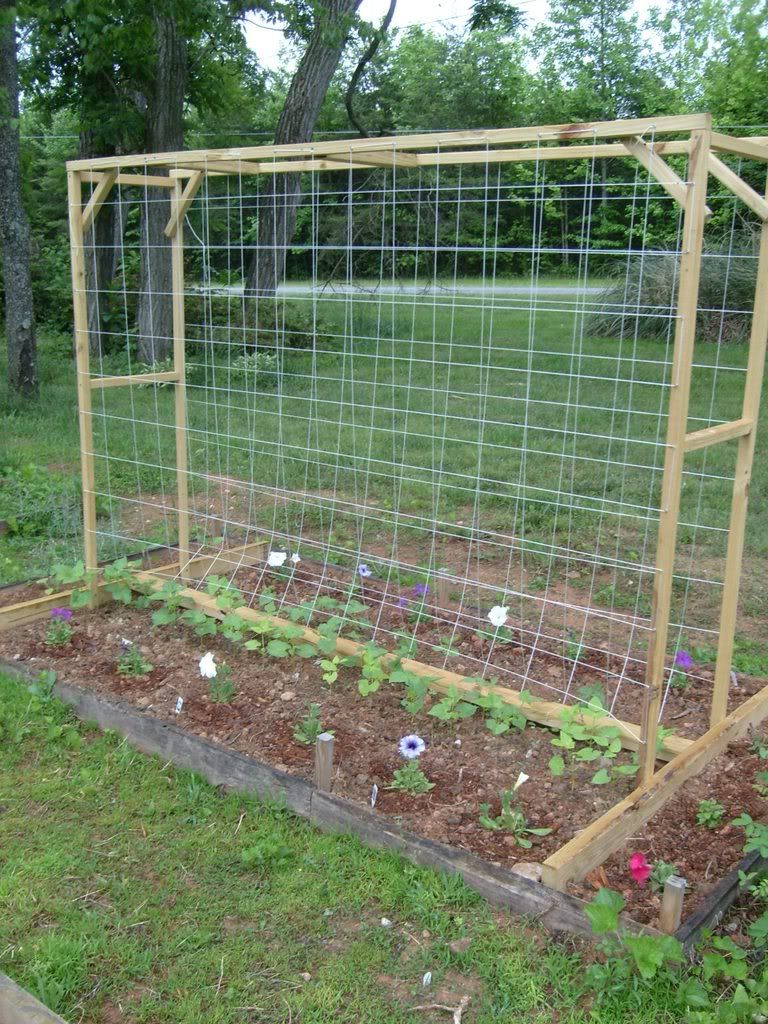
Steve did get the trellis he designed for our greenbeans finished and installed though! It is fabulous. I can't wait to see how the greenbeans work on it!! They are planted around it and I am waiting patiently for greenbeans to start climbing. Until then, enjoy my husbands handy work..free of charge ;)

Sunday, April 20, 2008
Finally, GARDEN updates
While I have not been doing a lot of creative cooking lately, I HAVE been working outdoors, taking advantage of the pretty weather. So I have some spring Garden updates for you!

 Above is the second bed that has the soil topping and is waiting to be tilled.


We have raked the garden boxes free of winter debris, Stephen tilled them and four of them have been filled with horse manure (two left to do). Two of them have been topped with fresh soil, and one has been retilled and planted with cabbages and various lettuce species. Stephen has also made progress on the new Bean Fences that will hopefully go into place this week as well. Here are some pictures of the boxes in the various stages as of this weekend!
Above is the finished bed newly planted with cabbage and lettuce.
Above is the second bed that has the soil topping and is waiting to be tilled.

Left: Layer of dried manure. Right: Empty bed that has been raked/tilled and is waiting for manure.
Friday, February 22, 2008
It's Time...for a Garden!
 Quit staring at the screen as if I were insane! I promise you, I'm not. In the past week, my jonquils have bloomed, the grass has had a mysterious shade of green appearing in spots, and my Spring Fever has switched into overdrive. That means, its time to be thinking about your gardens! Preparation is key to a thriving garden and really, there isn't that much prep time left. Ask me how I know!
 Coming from a long line of farmers and gardeners, I decided last year, I would try my hand at gardening. Ofcourse, me being me, I could not simply do things the way my family has always done them. If its not broke, don't fix it right? WRONG. I wanted a different way. One that suited me a little better, and didn't require all the gardening gadgets that we didn't have like a tractor and a tiller and at that point.....we were even hoeless. What were we thinking?
So Steve and I looked at our land and how we used it, and picked out a spot. I set off in early spring to research and investigate and read as much as I possibly could so that I would have a show piece of a garden. I was not about to do the trial and error method my first year out...which ofcourse as you know, no matter how much you think you know, its always trial and error the first time around! After much research, we decided on the BioIntensive Method. This method is basically ecologically friendly and yields four times the amount of produce on less land. (Perfect for suburban kitchen gardens.) My Garden bible? "How to Grow More Vegetables than you ever thought possible on less land than you can imagine" by John Jeavons. I live with this book and occasionally have even slept and bathed with this book. If you want to garden on a small plot of land, BUY THIS BOOK.
To give you a brief overview of last year, I will go ahead and tell you..we made several mistakes. We started too late, miscommunicated the design (but finally got it right-our first argument was literally over the garden..or as my husband NOW refers to it "my wife's dam garden boxes"), planted too late, didn't water enough, etc. The area we chose was a landmine field of roots and stumps which was a problem in itself so we did end up needing a tractor for the initial dig.
Fortunately, my father became our knight in shining armor and rode in on the most beautiful pile of rust I had ever seen in my life....my uncles crappy old tractor with glorious blades of rust that dug in, turned soil, and ripped at roots. After much chopping, digging, and raking we had the majority of the roots and grass removed and it was on to the tiller and the hoe. Now, the normal Biointensive Method uses a double dig process which is labor intensive but can be done with a simple shovel, but in case you haven't figured it out, I'm not normal....so I did bring in some of the traditional methods in the beginning. Once our boxes were built and in place (thanks to my darling sweet and complaining husband) we did the Double dig method more or less to "fluff" the dirt....all of this...took so much longer then we originally thought; so we were WEEKS late in planting and missed the initial spring crops all together. We did not actually get any "food" until the first of JULY.
My point in all of this is: Gardening Prep takes time, so plan early. Seed starting for my area of NC actually starts in two weeks......so it is TIME to be thinking about your garden plans. Most farmers who do traditional row plantings have already started preparing their plots and it is a beautiful sight to behold. Gently rolling fields of NC dirt (red clay) spreading off in rows for acres and acres as you drive through the country. Your first seeds should be started inside (if you choose to do seeds rather then buying the plants already started) on average six weeks before your estimated last frost. For my area, that date is April 22nd this year, so that only leaves two weeks to get ready. I am not big on starting seedlings, and usually buy beautiful plants from my reputable local nursery to save me time and space, but this is a good date for me to go by to know when I need my garden beds prepped for planting!
All in all, despite the mistakes and late starts, my garden was beautiful (even though it was weedy) and produced more then anyone expected. We suffered losses (RIP baby zuchini and squash) and reaped the benefits (tomatoes, peppers, cabbage, and green beans coming out of our ears). We had corn and cucumbers, eggplants, spaghetti and acorn squash, watermelons etc. We have a better idea of time frames, planting methods, and produce quantities. I even had praise from my mother who referred to my garden as the 'yuppie garden' in the beginning but was envious of it by the end of the year. This year, I pledge to have a better handle on it, and share the amazing journey of mother natures bounty with all of you! So grab your gloves and a shovel and come plant with me!
These pictures were taken last week (on Valentines Day actually). This is my garden with its "boxes" bedded down for the winter and melting snow. Four 5' x 20' boxes and Two 5'x 10' boxes surrounded by 3 foot pathways. At the very far end is our big pile of sandy soil that we will be adding to our boxes along with lots of horse manure over the next few weeks!
Subscribe to:
Posts (Atom)